FORTE fans often reach out to us with lots of questions about MIDI recording.
They wonder about the settings of their instrument.
They ask us about the buttons and settings of FORTE. Let us help you out there, guys. This article, complete with more than 10 illustrations and 2 videos, will guide you through 3 steps to MIDI recording with FORTE.
MIDI-Workshop: 3 Steps to MIDI recording and editing your music with FORTE
Step 1. Setting up your MIDI instrument for recording.
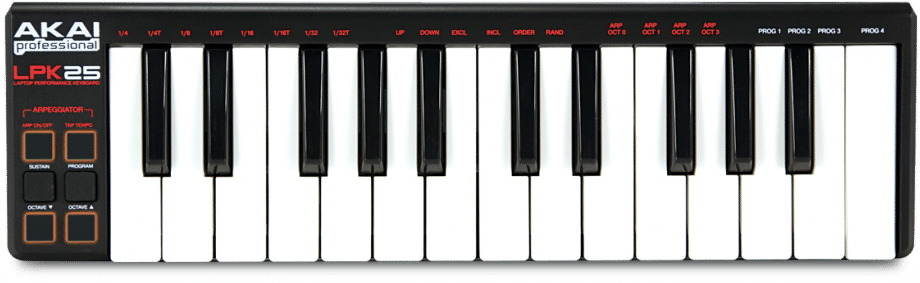
1. Connect your keyboard
with the USB cable.
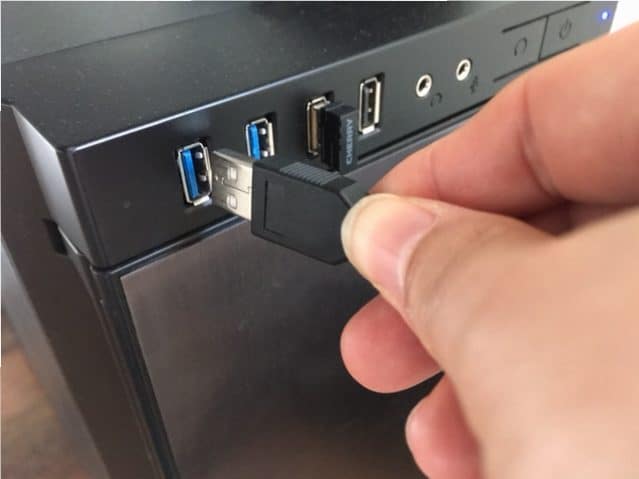
2. Connect USB cable to
your computer’s USB port.
As a first step, you’ll need to connect your MIDI instrument (say for example a keyboard) via USB or via a MIDI cable with an audio interface.
Then, you start the FORTE program. In the main menu “Options”, select “MIDI In”. You’ll find your MIDI instrument listed as “Default Recording Device”.
Select your device and click “apply”. If your keyboard has a sound module of its own, you might like to set it up as the default playback device. As a result, the sound will be better and the recording of your music will be more precise. In the tab “MIDI Out”, you can select the default playback device.
If your MIDI device doesn’t have a sound module of its own, we recommend you select “VST Synth” as the default playback device. This setting helps to reduce latency. Latency refers to a short period of delay (usually measured in milliseconds) between when an audio signal enters and when it emerges from a system. If you want your playback to always come from your MIDI instrument or from VST Synth, you check the box “Always use default device”. Click “apply” to confirm your choice.
FORTE’s now ready for recording! FORTE Home and FORTE Premium offer two recording options: Step mode and realtime mode. Step mode means that you enter each note after the other. You define the note value with either your computer mouse or the numbers of your computer keyboard (4 for a quarter note and so on).
Step 2: Setting up your score for recording a piano system
Just before you start entering the notes, you’ll need to set up your score for recording a piano system. Especially when you’re planning on recording several instruments it’s crucial that FORTE knows which track you’re recording.
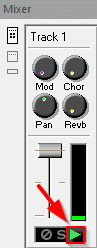
Open FORTE’s mixer by clicking the mixer icon. You find the mixer icon in the main tabs “Home” and “Record” at the far left. The key combination “alt+3” also opens the mixer.
The mixer opens at the bottom of your FORTE window. Go to the track (duct) of the instrument you’re planning on recording.
At the bottom of the duct you can see a small green triangle: the “Play” symbol. This means that this track is selected to playback. If you click the green triangle, it will turn into a red circle, the recording symbol.
Now, FORTE knows that you want to MIDI-record on this track with your instrument.
Step 3a: MIDI record (Step Mode)
Recording step mode means you record each single note after the other. Since FORTE Basic just offers the step mode, you’ll need to click on the MIDI record button for recording in step mode. When you’re using FORTE Home or FORTE Premium, you’ll need to click step mode first and subsequently click the MIDI record button.
You can use the input palette to select the note value, say a quarter, an eighth note or a sixteenth note. But you’ll be faster if you use the numbers of your computer keyboard. A “4” is a quarter, an “8” stands for the eighth note and a “6” for the sixteenth and so on. You find the layout of your computer keyboard under the main tab “Help”, then “Keyboard Layout”.
In the following video we will show you this combined method of writing your music. We’ll also show you how to set up your score.
Step 3b: MIDI record in real time (FORTE Premium and Home only)
Real time mode allows you to record your music alongside the metronome. FORTE interprets the note values of your music automatically.
The main tab “Record” shows you a range of options regarding the kind of recording. Next to the metronome, there’s “Region” which refers to a region of measures you can choose for recording.
If you want to record several versions of a region, you can set up a loop. Furthermore, FORTE can lead you in before recording. If you have loop mode activated, the lead-in is repeated with each new loop as well.
Under “Options”, the button at the far right side of the main tab “Record”, you decide what FORTE should do with your already entered music once you start a new recording or a new loop.
Now that you’ve set all parameters, click the red record button to start recording.
Quantization: Have FORTE correct the note values automatically
We’re humans, not robots. It can be quite difficult to play with a precise timing 100% of your recording. That’s why FORTE supports your music writing with quantizing your recorded notes. You select the smallest note value of your recorded music. Using quantization, your score is adjusted automatically.
To start quantizing your music, go to the main tab “Record”. At the right side of the menu ribbon, there’s “Quantization”. Click “Notes”. A property window opens. Select the parameters you want to quantize (say for example the starting time, the duration etc) as well as the division of the quarter note. It’s crucial to select the smallest note value of your recorded music here, for example 16th notes.
More options and MIDI-Routing for professionals
Go to the main tab “Options” and select “MIDI-In”, then “Routing” to select all the details regarding the MIDI channels selected for recording.
In this same window you can select the split point. This point defines the pitch which is used to divide / split your notes between tracks or voices. These features are especially interesting to the advanced MIDI user or the professional.
A note on the illustrations: Since FORTE 10, the notation software comes with two displays for the graphic interface: "day" and "night" mode. The illustrations above were made with FORTE 11 Premium in night mode. You can switch modes in the main menu "home", then "app mode".
We greatly hope that you enjoyed “3 Steps to MIDI recording with FORTE”. We’re looking forward to your comments below!
Your FORTE team