How to Write and Edit Fingering
“How can I make the font of the fingering bigger?
At the moment, I cannot read these numbers. Changing the text settings in the layout options didn’t do anything...”
Fingering is meant to help you (and your students) best navigate your sheet music.
Naturally, you want your navigation to be easy on the eye. And the numbers for your fingers must not interfere with your playing.
To accommodate personal preferences, FORTE comes with a variety of layout options related to fingering.
Let's have a look at these options step-by-step (and of course, we'll cover Mark's question).
Writing your fingering
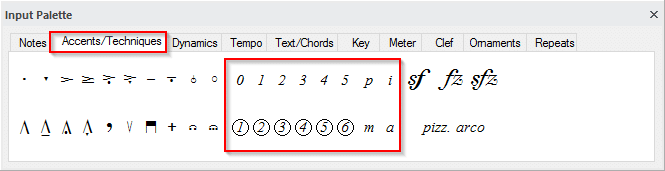
You can see the different types of numbers you have at your disposal in the image below. They can be found in the tab “Accents / Techniques” of the input palette.
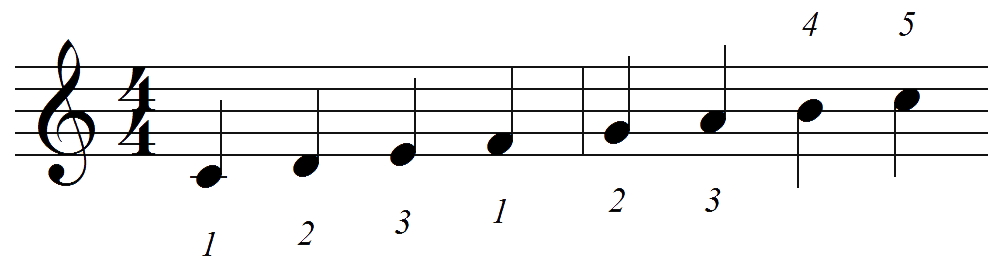
As a rule, the placement of the fingering is opposite to the direction of the note’s stem.
So, if the stem goes up, the fingering is below the note. And if the stem goes down, the fingering is above the note.
Editing the properties of your fingering
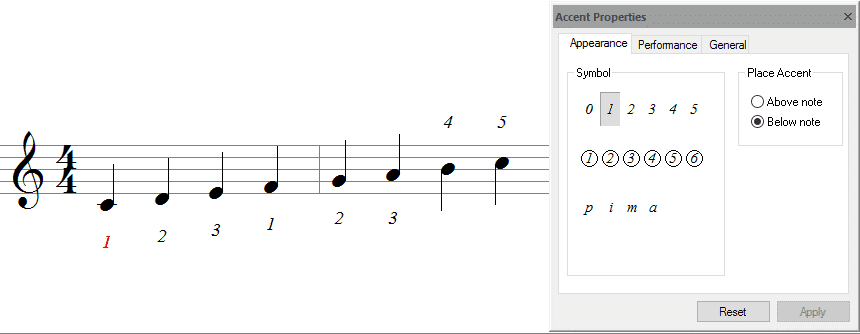
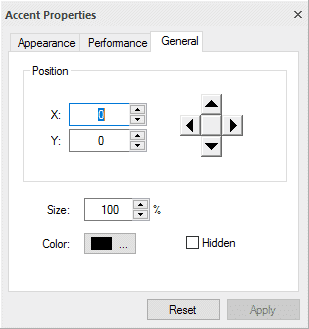
When you double-click on the fingering on your score, the properties window will open.
The tab “Appearance” allows you to change the number or symbol. You can also change the place of the element from “below” to “above” the note and vice versa.
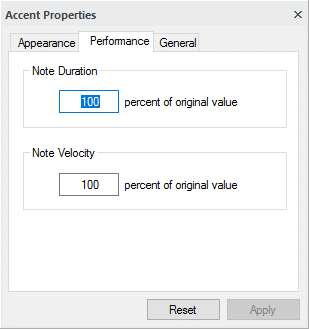
(The tab “Performance” enables editing of how an element influences the playback of the note. In the case of fingering, this tab is irrelevant.)
In the tab “General,” you can reposition the element, change its color or hide it completely. (Please note: changing the size value will not affect the symbol here.)
Tab: Performance
Tab: General
Layout your fingering: position and size
While you’re making the final adjustments on your layout, you can also edit the position of the fingering.
If you'd like to reposition an element, simply click on the element. It should now turn red. Press ctrl (and keep ctrl pressed) while using the arrow keys to reposition the element to the desired place.
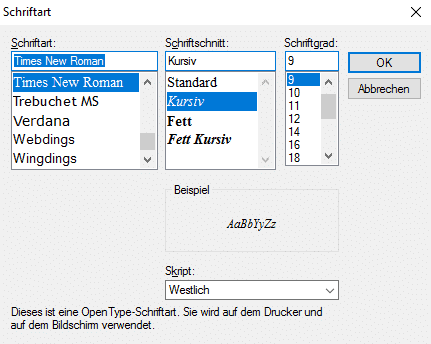
Edit the size of your fingering’s numbers here:
Score – Layout – General – Expression – Change

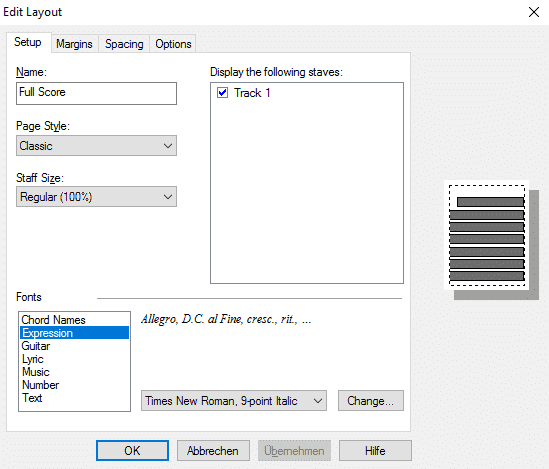
Please note:
In this selection, all accents are edited. It might be necessary to adjust some accent’s size manually again. Please open the properties window of the element you want to edit and adjust the percentage value.
Want to find out more about accents and the other elements of the input palette?
Looking for more layout tips? Here they are.
You can find more tutorials on our YouTube channel.
Did you find this blog post helpful? Let us know... we're looking forward to your comments and suggestions
for more posts and tutorials!

")
")


")


Quite helpful! Thanks
You’re welcome 🙂
I was just to the point in a new piece with complex fingerings and I get an email from you on almost the same day, keep it coming. I’m Forte’ing older handwritten composition in a day or two. You are AWESOME’
Thank you for your comment, bobeeee!
Great we could help 🙂
The email to add fingering came at an excellent time for me.
It is extremely helpful and I am really enjoying using Forte
Dear Jim,
thank you very much for your feedback. We are glad that you find our tutorials usefull. Enjoy scoring with FORTE.
Matthias and the FORTE-Team